Implementing OAuth2 and OpenID Connect (OIDC) with Keycloak: A Python & React Guide
Learn how to implement OAuth2 and OpenID Connect using Keycloak, Docker, Python, and React with secure production-ready best practices.
Introduction
In today’s digital landscape, application security is paramount. Authentication and authorization are two of the most critical aspects of secure system design. OAuth2 is a widely adopted authorization framework, and OpenID Connect (OIDC) is an identity layer on top of OAuth2 that enables clients to verify user identities. Keycloak, a powerful open-source Identity and Access Management solution, allows you to implement OAuth2/OIDC effortlessly across your stack.
In this post, we will guide you step-by-step through deploying Keycloak using Docker, setting up your realm and clients, and integrating secure authentication flows into a Python (FastAPI) backend and a React frontend. We’ll also cover security hardening tips for production environments.
Table of Contents
- Installing Keycloak with Docker
- Initial Configuration
- Registering Applications (Clients)
- Integrating with Python (FastAPI)
- Integrating with React
- Security Best Practices for Production
- Conclusion
- References
You can find all codes for this post in reference section.
Installing Keycloak with Docker
Keycloak offers an official Docker image that’s ideal for rapid local development.
docker run -p 8080:8080 \
  -e KEYCLOAK_ADMIN=admin \
  -e KEYCLOAK_ADMIN_PASSWORD=admin \
  quay.io/keycloak/keycloak:24.0.3 \
  start-dev
or using docker-compose
version: '3.8'

services:
  keycloak:
    image: quay.io/keycloak/keycloak:24.0.3
    container_name: keycloak
    command: start-dev
    ports:
      - "8080:8080"
    environment:
      KEYCLOAK_ADMIN: admin
      KEYCLOAK_ADMIN_PASSWORD: admin
    networks:
      - keycloak-net

networks:
  keycloak-net:
    driver: bridge
Open http://localhost:8080 and login with the admin credentials.
Initial Configuration
- Create a Realm: Go to the admin console, select Create Realm, and name it (e.g.,
demo). - Create Users: Add users under
Users, assign them roles and set passwords.
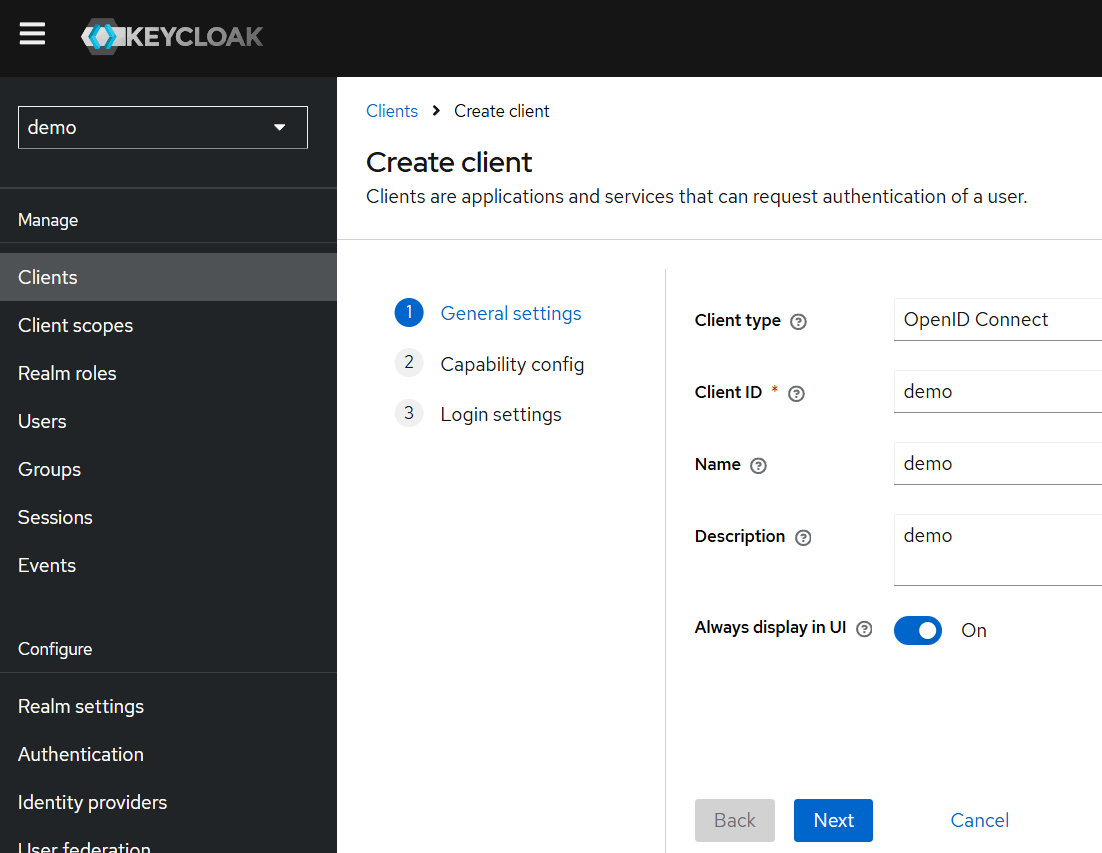
Registering Applications (Clients)
We will registrer only one application called “demo”. And we’ll used it for frontend and backend. But that is not a recomendable practice.
To register an application, follow these steps:
- Go to
Clients> Create. - Set:
- Client ID:
demo - Protocol:
openid-connect - Access Type:
public(React)
- Client ID:
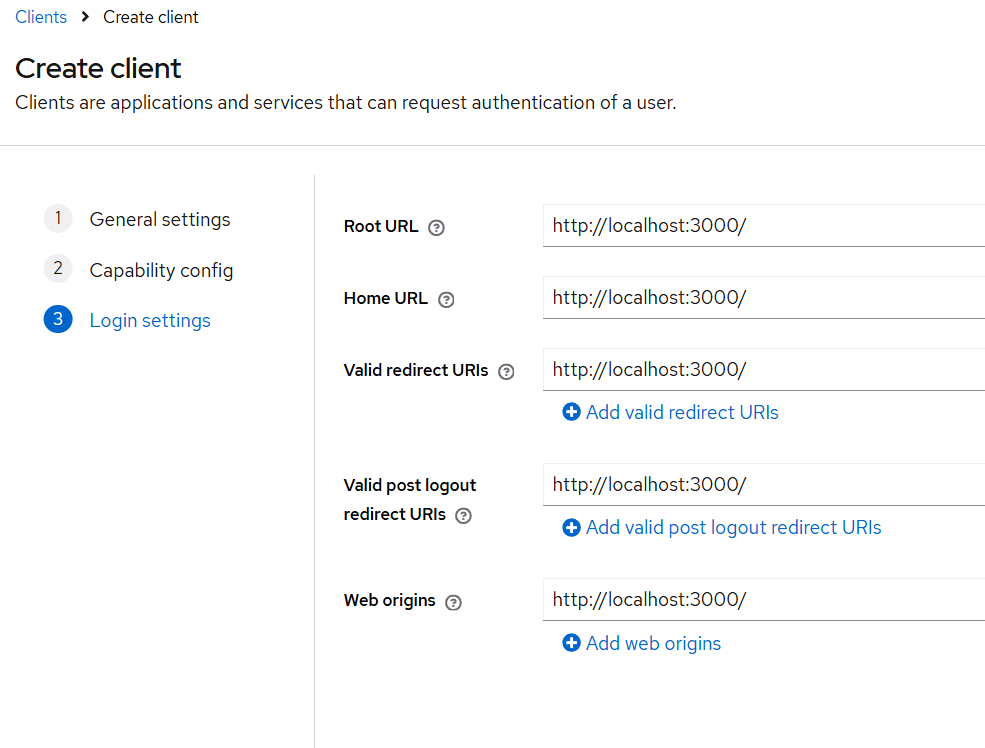
- Add valid redirect URIs:
- React:
http://localhost:3000/*
- React:
Integrating with Python (FastAPI)
Use a custom middleware in FastAPI, to manage the access. This middleware has an interaction with keycloak in a simply way, only for retrieve the user information.
from fastapi import FastAPI


from fastapi.middleware.cors import CORSMiddleware
import os

from fastapi import Request
from fastapi.responses import JSONResponse
from keycloak import KeycloakOpenID
from starlette.middleware.base import BaseHTTPMiddleware, \
    RequestResponseEndpoint
from starlette.responses import Response

KEYCLOAK_OPENID = KeycloakOpenID(
    server_url=os.getenv('KEYCLOAK_URL', None),
    client_id=os.getenv('CLIENT_ID', None),
    realm_name=os.getenv('REALM', None),
)
the_user = None

class AuthMiddleware(BaseHTTPMiddleware):
    """

    This code defines an AuthMiddleware class that extends BaseHTTPMiddleware
    to handle authentication for incoming HTTP requests. It checks if the
    request URL is in a predefined list of paths that do not require
    authentication. If the URL is not in this list, it verifies the
    presence of a valid API key in the request headers before allowing
    the request to proceed.

     """
    __jump_paths__ = ['/docs', '/openapi.json', '/redoc',
                      '/health', '/favicon.ico', ]

    __name__api_key__ = 'API_KEY'
    __auth__ = 'authorization'

    def __init__(self, *args, **kwargs):
        super().__init__(*args, **kwargs)

    @staticmethod
    def unauthorised(
            code: int = 401, msg: str = 'Unauthorised') -> JSONResponse:
        """
            Return a message of unauthorised
        """
        return JSONResponse(status_code=code, content=msg)

    def _is_jump_url_(self, request: Request) -> bool:
        return request.url.path in self.__jump_paths__

    def decode_token(self, token: str):
        token_ = token.replace('Bearer ', '')
        payload = KEYCLOAK_OPENID.decode_token(token_)
        global the_user
        the_user = payload
        return payload

    def get_header_token(self, request: Request):
        return request.headers.get(self.__auth__, '')

    def get_user_config(self, request: Request) -> dict:
        token = self.get_header_token(request)
        try:
            decode_token = self.decode_token(token)
            return decode_token
        except Exception:
            return {}

    def is_auth(self, request: Request) -> dict:
        """
        queda por implementar
        :param request:
        :return:
        """
        return self.get_user_config(request)

    async def dispatch(
        self, request: Request, call_next: RequestResponseEndpoint
    ) -> Response:
        """
        The dispatch method in the AuthMiddleware class is an asynchronous
        middleware function that processes incoming HTTP requests.
        It checks if the request URL is in a predefined list of paths
        that do not require authentication. If the URL is not in this
        list, it verifies the presence of a valid API key in the request
         headers before allowing the request to proceed.

        :param request:  An instance of Request representing the incoming
            HTTP request.
        :param call_next: A callable (RequestResponseEndpoint) that processes
            the next middleware or the actual request handler

        :return: Returns a Response object, either from the next
            middleware/request handler or an unauthorized response.
        """
        if self._is_jump_url_(request):
            return await call_next(request)

        response = self.unauthorised()

        if len(self.is_auth(request)) > 0:
            response = await call_next(request)

        return response

app = FastAPI()

app.add_middleware(AuthMiddleware)
app.add_middleware(
    CORSMiddleware,
    allow_origins=['*'],
    allow_credentials=True,
    allow_methods=["*"],
    allow_headers=["*"],
)

@app.get("/protected")
def read_protected(message: str = 'probe'):
    return {"message": message + "Received", "user": the_user}


if __name__ == '__main__':
    import uvicorn
    uvicorn.run(app=app, host="localhost", port=8000)
Integrating with React
Use keycloak-js to handle OIDC authentication in React. With this file you can manage the
autentification using login portal from keycloak. We only include here the file that
interacts with keycloak. You can find the full react project in the references.
import Keycloak from "keycloak-js";


const keycloakOptions = {
  url: import.meta.env.VITE_KEYCLOAK_URL,
  realm: import.meta.env.VITE_REALM,
  clientId: import.meta.env.VITE_CLIENT_ID,
};

const keycloakInstance = new Keycloak(keycloakOptions);
let authenticated = null;
/**
 * Initializes Keycloak and handles authentication.
 */
export const initKeycloak = async () => {
  try {
    if (!authenticated){
      authenticated = await keycloakInstance.init({
        onLoad: "login-required",
        checkLoginIframe: false,
      });
    }

    if (authenticated) {

      setInterval(async () => {
        if (keycloakInstance.isTokenExpired()) {
          await keycloakInstance.updateToken(30);
        }
      }, 30000);

    }

    return authenticated;
  } catch (error) {
    console.error(`Error in Keycloak: ${error}`);
    return false;
  }
};

/**
 * Close and clean the session.
 */
export const handleLogout = () => {
  if (keycloakInstance) {
    sessionStorage.removeItem("token");
    keycloakInstance.logout();
  }
};

export default keycloakInstance;
For any request made to the Python API, you must include an Authorization Bearer token in the header, using the token you received when logging in. This token is used by your Python backend to validate the request.
Security Best Practices for Production
To prepare your system for production:
- ✅ Enable HTTPS with a reverse proxy (e.g., NGINX + Let’s Encrypt or Traefik)
- ✅ Enable Multi-Factor Authentication (MFA) using OTP apps
- ✅ Enforce strong password policies in Keycloak settings
- ✅ Configure token lifetimes to reduce risk of token theft
- ✅ Enable audit logging and review security events
- ✅ Regularly backup Keycloak DB and config
Conclusion
Implementing OAuth2 and OpenID Connect with Keycloak gives you a solid foundation for secure identity and access management. By using Docker, you can spin up Keycloak quickly for dev/testing, and integrating it with FastAPI and React helps secure full-stack applications. Always apply security hardening before moving to production.
What’s Next?
-
Role-Based Access Control (RBAC) with Keycloak
Dive deeper into Keycloak by implementing fine-grained role and permission management across your frontend and backend. -
Custom User Attributes and Claims in Tokens
Learn how to enrich your tokens with custom claims and use them for authorization logic in your FastAPI backend. -
Single Sign-On (SSO) Across Multiple Applications
Explore how to configure SSO using Keycloak for multiple React apps or microservices sharing authentication. -
User Self-Service Portals with Keycloak Themes
Customize the Keycloak login, registration, and account management pages to match your application’s brand. -
Deploying Keycloak Securely in Kubernetes with Ingress and TLS
Take your deployment to the next level by running Keycloak in a Kubernetes cluster with secure ingress and scalability in mind.